ChatGPT has stormed the internet in the last four months with its capabilities to understand and generate natural language with remarkable fluency and accuracy. OpenAI, the creator of ChatGPT, recently released a ChatGPT API that enables you to create a wide range of applications that require natural language processing, like chatbots, virtual assistants, and more.
This article outlines how you can take advantage of these powerful AI models and create apps using Flutter and Dart.
Overview of ChatGPT
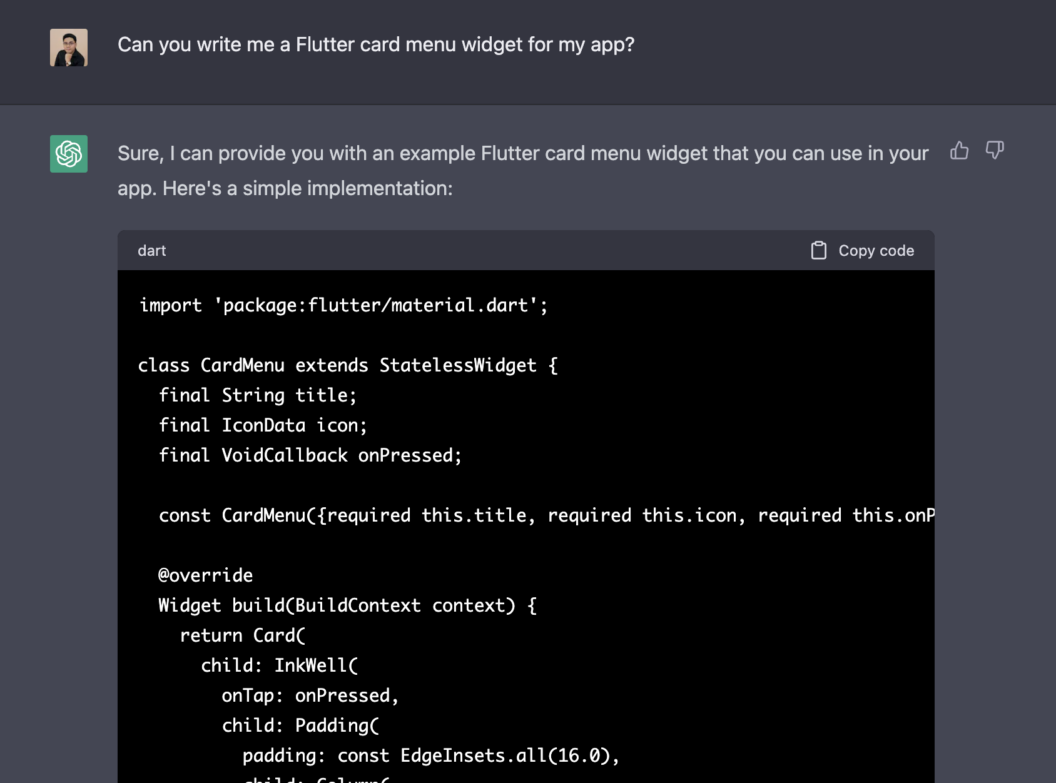
ChatGPT is a large language model that performs language processing tasks like language modeling and text generation. ChatGPT was trained on a vast training data set from different sources, including the web. Despite the fact that its training data only goes to 2021, it is still able to answer my queries correctly most of the time:
Although, you should be mindful of the accuracy of the responses, because ChatGPT might give you confidently incorrect answers, as shown below:
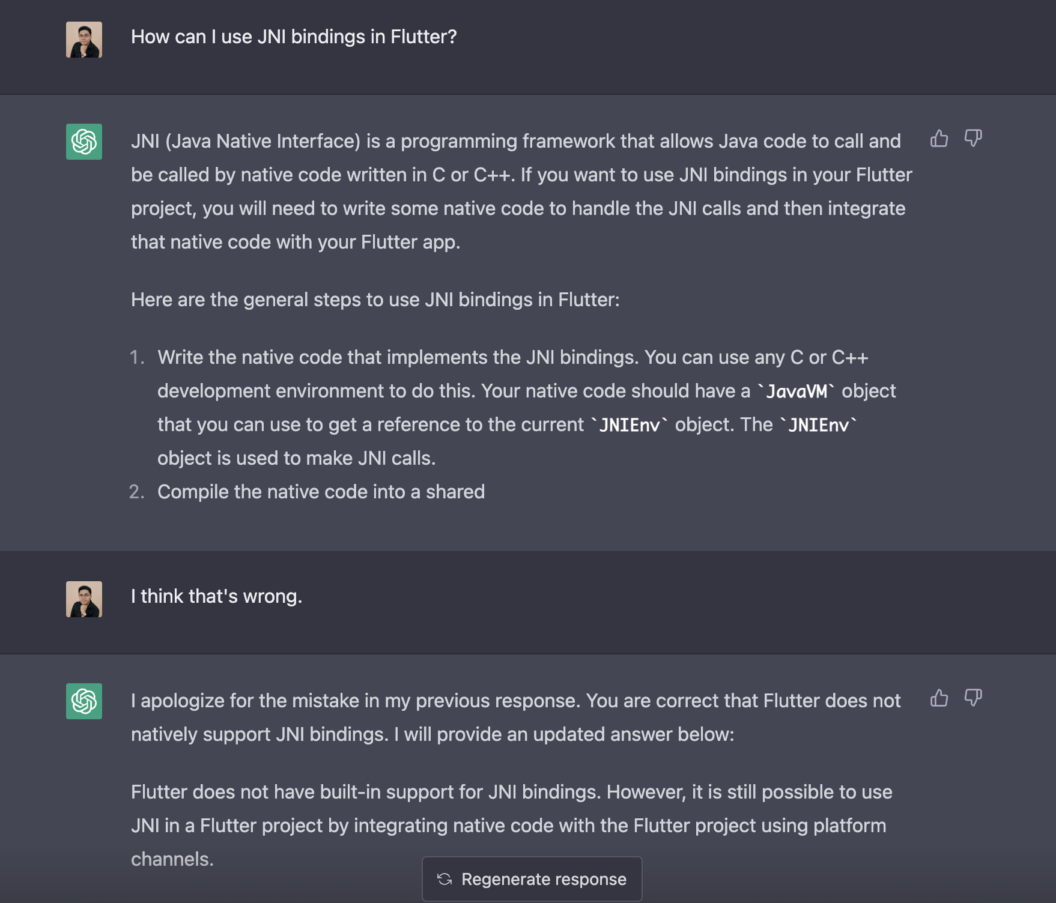
My experience is that you need to be specific with your prompts to get high-quality responses from ChatGPT. Also, you have to be knowledgeable to comprehend the responses.
ChatGPT also has a ChatGPT Plus subscription where you can access ChatGPT during peak hours, get faster responses, and try out new features like GPT-4.
ChatGPT vs other OpenAI models
ChatGPT is one of the several large language models built and maintained by OpenAI, which include Ada (1.2b parameters), Babbage (1.5b parameters), Curie (2.7b parameters), and Da Vinci (175b parameters). The term “parameters” refers to the number of weights the model learned during the training process.
ChatGPT and OpenAI’s other language models differ in training data size, capabilities, speed, and cost. ChatGPT has around 6 billion parameters and was made specifically for general language processing.
You can fine-tune each OpenAI language model to your specific needs or domain.
Creating an OpenAI API key
You will need an OpenAI API key to access OpenAI APIs via RESTful APIs. Create a new account and add your credit card to get $5 in free credits during your first 3 months. OpenAI has a pay-per-use pricing model. See OpenAI’s pricing for more details.
- Go to the OpenAI website at https://platform.openai.com/overview.
- Click on the “Sign Up” button in the top right corner of the page.
- Fill out the registration form with your name, email address, and password. You must also agree to the OpenAI terms of service and privacy policy.
- Once you have registered, log in to your OpenAI account.
- Open the page for the API keys at https://platform.openai.com/account/api-keys.
- Click on the “Create new secret key” button.
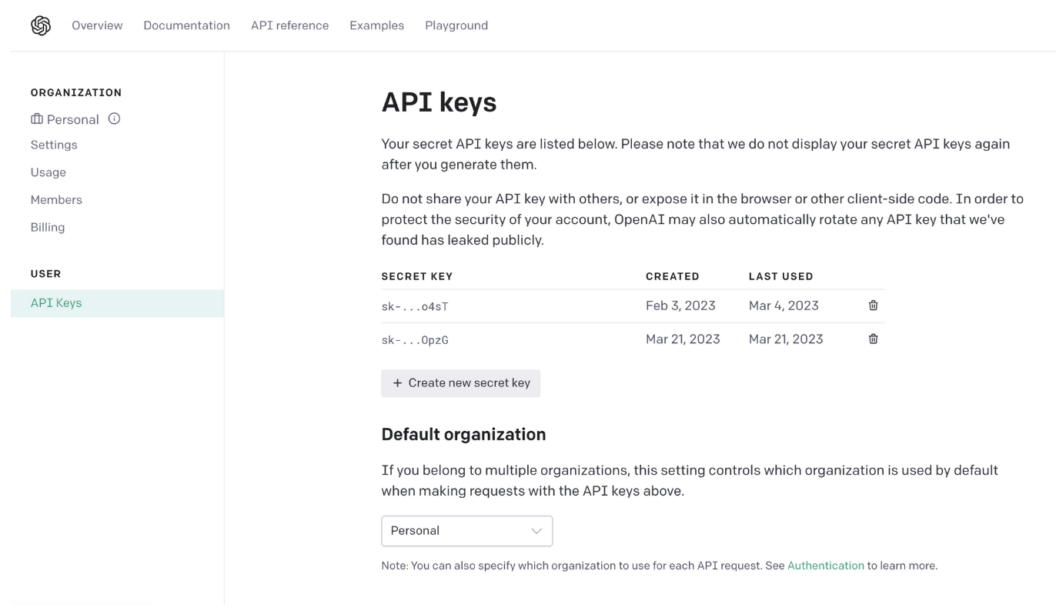
7. OpenAI Developer Platform
8. Copy the API and store it securely.
Integrating ChatGPT with Flutter
Flutter is a multi-platform UI toolkit that lets you create apps for almost any screen, whether mobile, web, or native desktop. Flutter helps you to stay productive while still being able to create functional and beautifully-designed apps.
We’ll integrate ChatGPT into a Flutter iOS app using Flutter 3.7 stable SDK. Please read the macOS install guide for Flutter to set up and debug the app using iOS simulators.
ChatGPT SDK
Flutter has a community-based SDK wrapper for OpenAI’s APIs to help you get up to speed integrating ChatGPT into your Flutter apps.
Setting up a Flutter project
First, clone (or download the zip) the project from: https://github.com/joshuadeguzman/echo_ai.
git clone <https://github.com/joshuadeguzman/echo_ai>
Next, create a file .env in the assets directory.
Next, in the assets/.env file, add YOUR_API_KEY with your OpenAI API key:
OPENAI_API_KEY=<YOUR_API_KEY>
Last, run the project using VS Code extension or terminal:
flutter run
Integrating ChatGPT SDK
Let’s see how we can add ChatGPT to our Flutter app. We’ll add features to send requests and process user prompts using OpenAI APIs.
Handling the Initial Response
First, let’s initialize the ChatGPT SDK. In the lib/chat.dart, add the following code to the initState():
// lib/chat.dart

@override
void initState() {
  _messages = [];
  _isLoading = false;

    // Initialize ChatGPT SDK
  _openAI = OpenAI.instance.build(
    token: dotenv.env['OPENAI_API_KEY'],
    baseOption: HttpSetup(
      receiveTimeout: const Duration(seconds: 30),
    ),
  );

    // This tells ChatGPT what his role is
  _handleInitialMessage(
    'You are a ${widget.character.toLowerCase()}. Please send a super short intro message. Your name is Echo.',
  );
  super.initState();
}
Next, inside the _handleInitialMessage method, let’s handle the initial message request and response:
// lib/chat.dart

Future<void> _handleInitialMessage(String character) async {
  setState(() {
    _isLoading = true;
  });

  final request = ChatCompleteText(
    messages: [
      Map.of({"role": "assistant", "content": character})
    ],
    maxToken: 200,
    model: kChatGptTurbo0301Model,
  );

  final response = await _openAI.onChatCompletion(request: request);

  ChatMessage message = ChatMessage(
    text: response!.choices.first.message.content.trim().replaceAll('"', ''),
    isSentByMe: false,
    timestamp: DateTime.now(),
  );

  setState(() {
    _messages.insert(0, message);
    _isLoading = false;
  });
}
Hot reload to reflect the changes.
Tap Product Manager from the Home Page menu. You should see a welcome message from ChatGPT, as shown below:
Handle User Response
First, in the _handleSubmit method, add the following to handle the user prompts:
// lib/chat.dart

Future<void> _handleSubmit(String text) async {
  setState(() {
    _isLoading = true;
  });
  _textController.clear();

  // Add the user sent message to the thread
  ChatMessage prompt = ChatMessage(
    text: text,
    isSentByMe: true,
    timestamp: DateTime.now(),
  );

  setState(() {
    _messages.insert(0, prompt);
  });

  // Handle ChatGPT request and response
  final request = ChatCompleteText(
    messages: [
      Map.of({"role": "user", "content": text})
    ],
    maxToken: 200,
    model: kChatGptTurbo0301Model,
  );
  final response = await _openAI.onChatCompletion(request: request);

  // Add the user received message to the thread
  ChatMessage message = ChatMessage(
    text: response!.choices.first.message.content.trim(),
    isSentByMe: false,
    timestamp: DateTime.now(),
  );

  setState(() {
    _messages.insert(0, message);
    _isLoading = false;
  });
}
Next, inside the _buildChatComposer method, add the following to call the prompt submission:
// lib/chat.dart

Widget _buildChatComposer() {
  return Container(
    margin: const EdgeInsets.symmetric(
      horizontal: 8,
      vertical: 12,
    ),
    child: Row(
      children: [
        Expanded(
          child: TextField(
            controller: _textController,
            decoration: InputDecoration.collapsed(
              hintText: 'Type a message',
              enabled: !_isLoading,
            ),
            // Add this to handle submission when user presses done
            onSubmitted: _isLoading ? null : _handleSubmit,
          ),
        ),
        IconButton(
          icon: const Icon(Icons.send),
          // Add this to handle submission when user presses the send icon
          onPressed: _isLoading
              ? null
              : () => _handleSubmit(
                    _textController.text,
                  ),
        ),
      ],
    ),
  );
}
Hot reload to reflect the changes.
Enter a question prompt and tap send, and you’ll get the following:
That’s it! You have integrated ChatGPT into a Flutter app. Now, let’s try to set up a CI/CD workflow for our app using Semaphore.
Deploying a Flutter App using Semaphore
Semaphore is a CI/CD (continuous integration and delivery) platform that allows developers to automate workflows for build, test and deployment phases. Read this guide to get started with Semaphore.
We’re going to create and configure our workflows using Semaphore’s Visual Builder.
Configuring the workflow for the project
First, in the navigation bar, click “Create New +” to create a new project**.**
Then, select the repository of your project.
Last, click “Customize” to manually set up your workflows.
Setting up the continuous integration workflow
We will set our main pipeline to use a Mac-Based Virtual Machine environment with a macos-xcode14 image.
Let’s start our workflow by creating our main block.
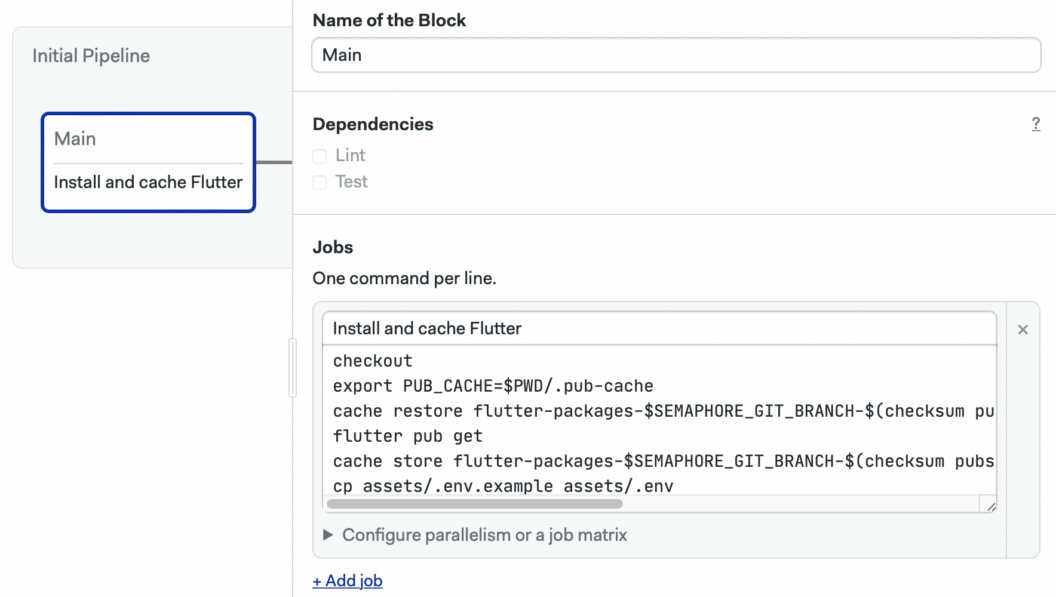
Now, let’s install and cache Flutter.
checkout
export PUB_CACHE=$PWD/.pub-cache
cache restore flutter-packages-$SEMAPHORE_GIT_BRANCH-$(checksum pubspec.yaml),flutter-packages-$(checksum pubspec.yaml),flutter-packages
flutter pub get
cache store flutter-packages-$SEMAPHORE_GIT_BRANCH-$(checksum pubspec.yaml),flutter-packages-$(checksum pubspec.yaml),flutter-packages .pub-cache
cp assets/.env.example assets/.env
Next, let’s write our jobs for the lint block:
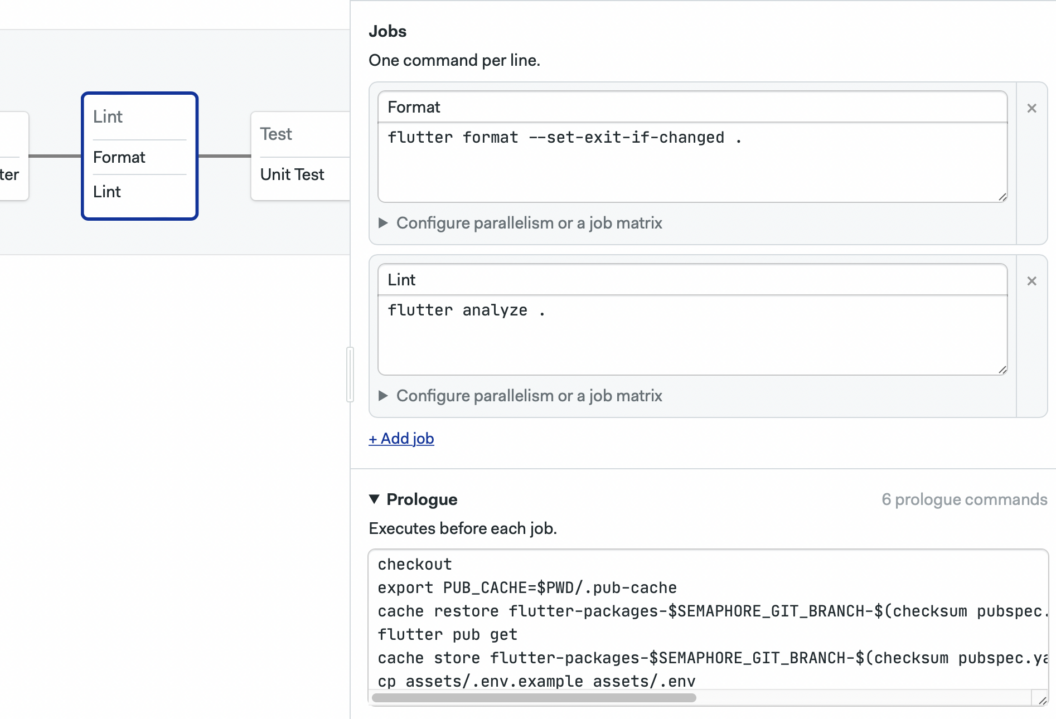
Format
flutter format --set-exit-if-changed .
Analyze
flutter analyze .
Prologue
checkout
export PUB_CACHE=$PWD/.pub-cache
cache restore flutter-packages-$SEMAPHORE_GIT_BRANCH-$(checksum pubspec.yaml),flutter-packages-$(checksum pubspec.yaml),flutter-packages
flutter pub get
cache store flutter-packages-$SEMAPHORE_GIT_BRANCH-$(checksum pubspec.yaml),flutter-packages-$(checksum pubspec.yaml),flutter-packages .pub-cache
cp assets/.env.example assets/.env
Last, add a test block to run our unit tests.
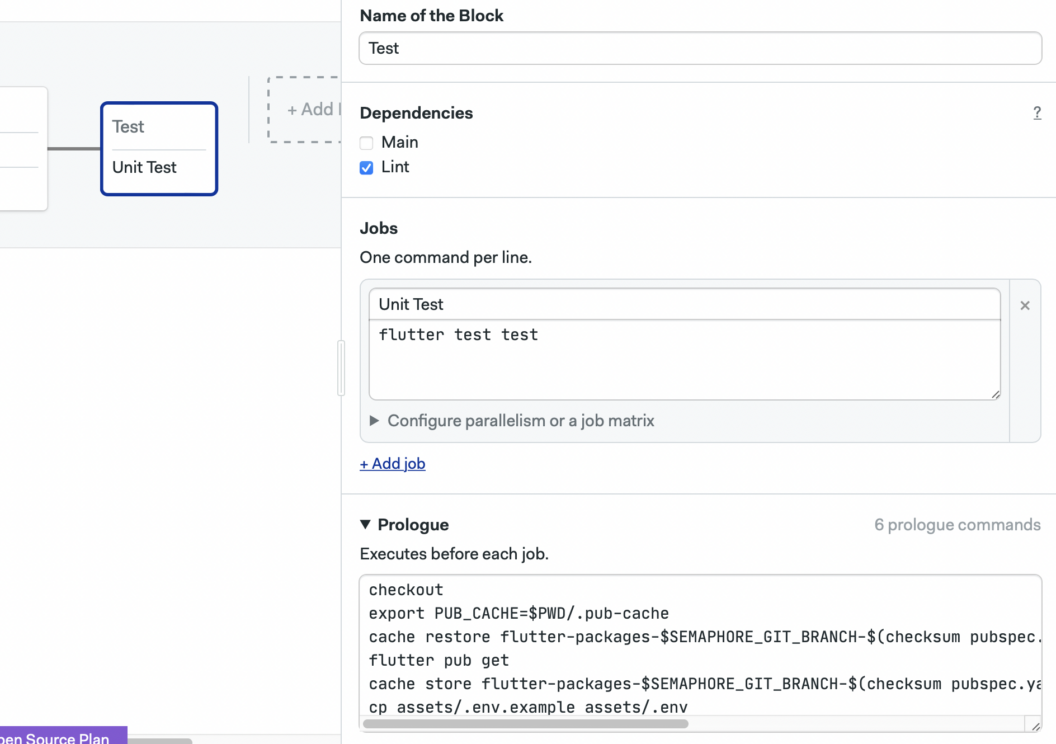
Test
flutter test test
Prologue
checkout
export PUB_CACHE=$PWD/.pub-cache
cache restore flutter-packages-$SEMAPHORE_GIT_BRANCH-$(checksum pubspec.yaml),flutter-packages-$(checksum pubspec.yaml),flutter-packages
flutter pub get
cache store flutter-packages-$SEMAPHORE_GIT_BRANCH-$(checksum pubspec.yaml),flutter-packages-$(checksum pubspec.yaml),flutter-packages .pub-cache
cp assets/.env.example assets/.env
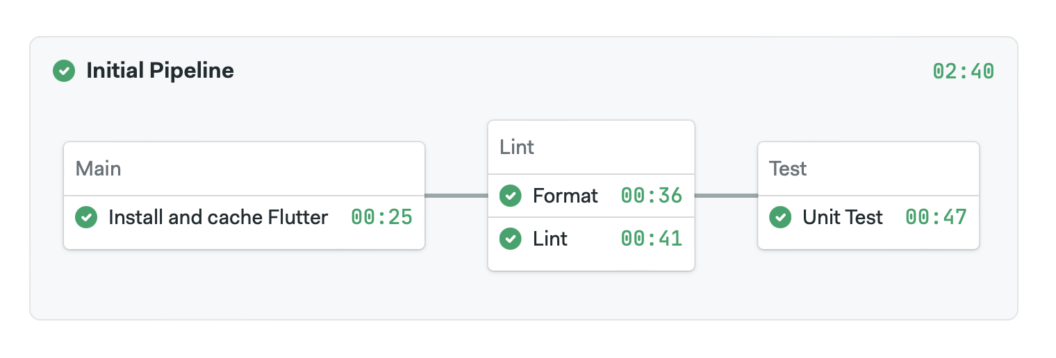
Amazing. You have successfully built your continuous integration pipeline. You’re now ready to automate your deployment with Semaphore.
For more, you can read our article on Automate Flutter App Deployment on iOS to TestFlight using Fastlane and Semaphore to deploy your apps to TestFlight. We also have articles on how you can deploy Flutter iOS apps and Flutter Android apps on Firebase.
Conclusion
ChatGPT has a lot of potential for new business ideas and improving existing ones. You can leverage ChatGPT models for your Flutter apps to create chatbots, SaaS applications, and much more. You can fine-tune your models to accomplish specific tasks that meet your business requirements with better performance and accuracy. Finally, you can deploy the code changes and your Flutter projects using Semaphore for a reasonable cost and with faster performance.